Adding Google Analytics code to WordPress

What is the first thing that you would like to know once you have a fully functioning website or a blog? You would like to know how much traffic your site is able to generate. And more importantly, you would like to know the source of your traffic so that you work on improving it. This is where Google Analytics comes in. In this article, we’ll be discussing how you can add your Google Analytics code to WordPress account and start tracking your incoming traffic.
How to set up Google Analytics on WordPress
This is the very first step wherein you need to create a Google Analytics account for your website. Setting up a Google Analytics account can be a bit tricky as you need to create different layers to your account (Creating Google Analytics Account, Property, and a View).
Here is a step-by-step guide on ‘How to set up a Google Analytics account‘ where we’ve discussed each of these in detail.
The next step is to add the Google Analytics code to your WordPress account.
How to add Google Analytics code to WordPress
There are different ways of adding the Google Analytics code to your website, in this case, WordPress.
- Manually copy-pasting the code to WordPress
- Use WordPress plugin to add the code from Google Analytics
- Using Google Tag Manager to add Google Analytics to WordPress
We’ll be discussing each of these methods in detail. However, before beginning with any of the above mentioned methods, you need to first find the Google Analytics code for the account that you have set up. We’ll be discussing how to retrieve your Google Analytics code in the next step.
Where to find Google Analytics Code?
Follow the below mentioned steps to retrieve your Google Analytics tracking code:
- Click on the ‘Admin Settings’ tab located at the bottom in the left pane. You’ll be re-directed to your Account. Note – If you’ve multiple GA accounts and properties in place, make sure you select the relevant ones from the drop-down before proceeding.
- Navigate to ‘Property tab’ -> Tracking Info -> Tracking Code
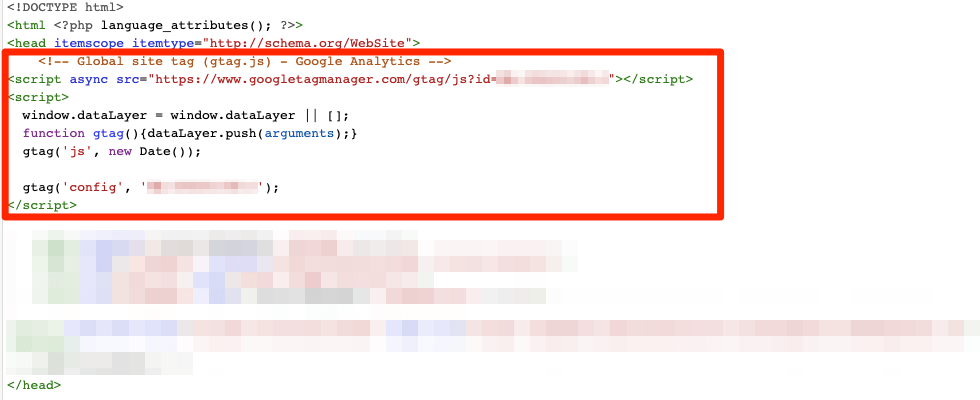
- Under the ‘Global Site tag’, you’ll find the relevant code that is to be added.
- Click on the code and copy it.
That’s it. You have copied the Google Analytics code for your account. In the next steps, we’ll be discussing how you can add your copied Google Analytics code to WordPress.
Methods to add Google Analytics code to WordPress
1. Manually add Google Analytics code to WordPress
This is a manual process but is preferred in most cases, as it is the simplest and the least error prone of methods. Follow the below mentioned steps to manually add your Google Analytics code to your WordPress account.
- Log in to your WordPress account (‘domain-name/wp-admin‘).
- Navigate to ‘Appearance‘ in the left pane and click on ‘Theme Editor‘.

- Here you’ll find the theme that is currently in place along with its theme files, as shown in the right pane.
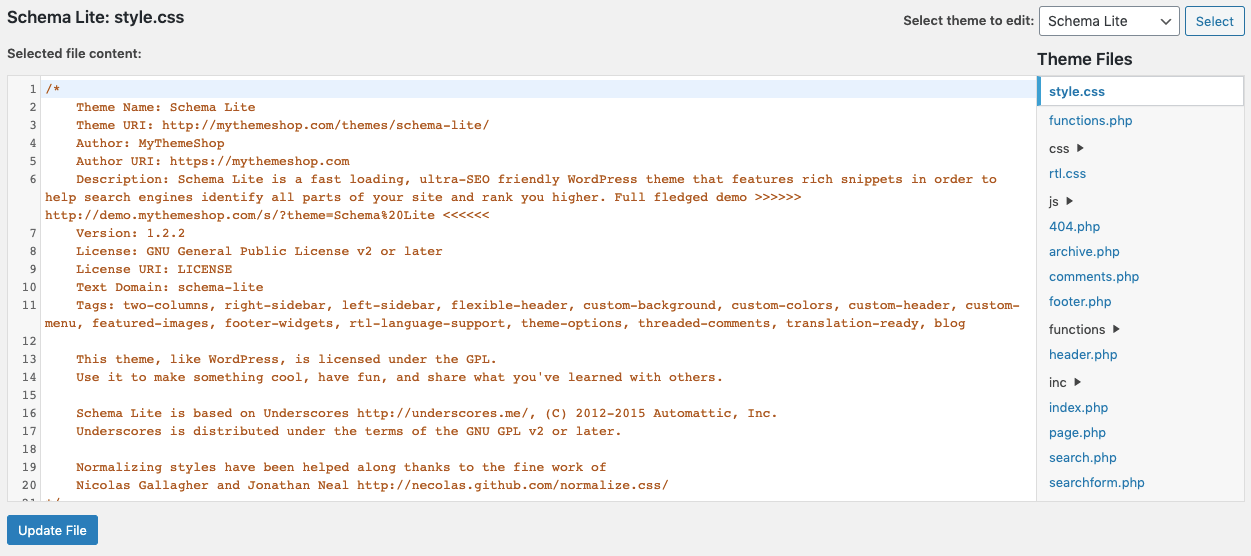
- Open the header.php file located in the Theme files on the right pane.
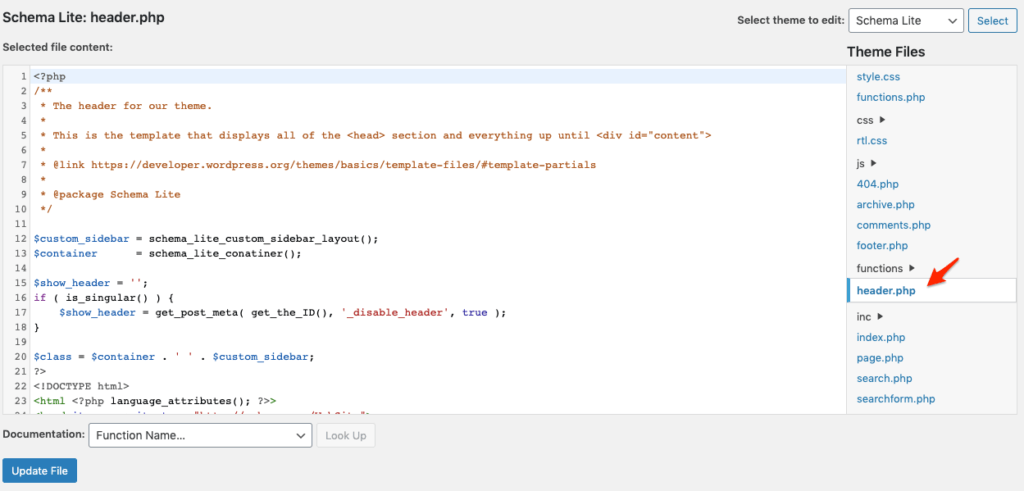
- Locate the <head> tag in the header.php file. You will find it to be the second tag, after the <HTML> tag on the page.

- Under the <head> tag, add Google Analytics code that you just copied as the first line.
- Click on ‘Update file‘.
That’s it. You’ve successfully added your website for tracking in Google Analytics manually.
2. Use Google Tag Manager to add Google Analytics code to WordPress
If you’re struggling with the previous method to find the relevant files, or are using other platform apart from WordPress, use this method.
Google Tag Manager is a tag management system that allows you to easily add pieces of code to your existing website without opening any backend files.
Follow the below mentioned steps to use Google Tag Manager to add your Google Analytics code to your website:
- Create an account in Google Tag Manager (you can also link an existing Google Analytics account with the Tag Manager).
- Once you have an account in Tag Manager, navigate to the Workspace Overview screen.
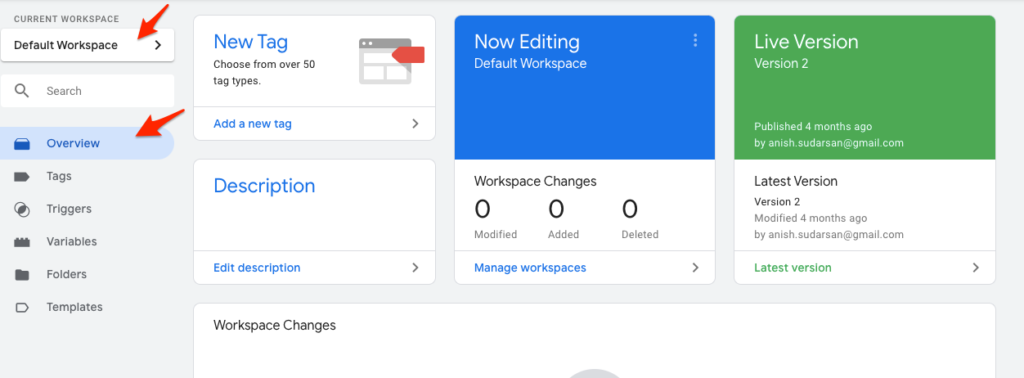
- Click on Add a New tag from anywhere in the Workspace screen.
- You will be navigated to the configuration tab.
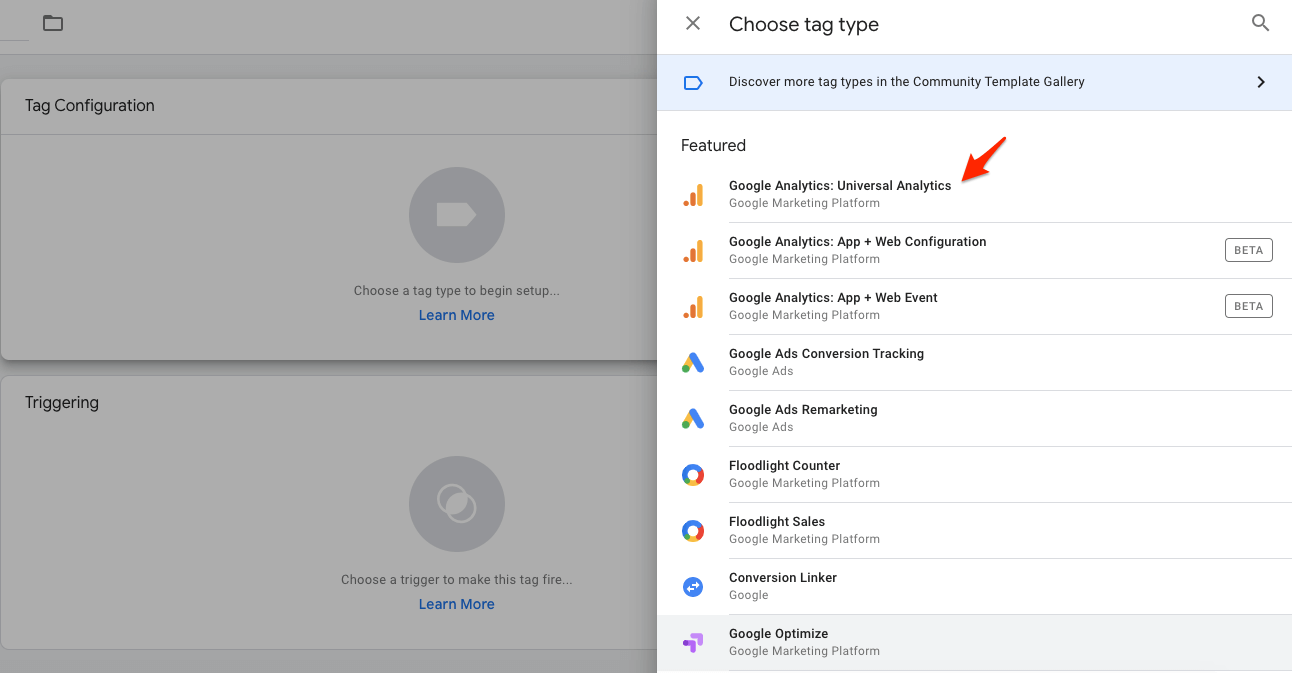
Tag Configuration
- Edit Tab Configuration and Select ‘Universal Analytics‘.
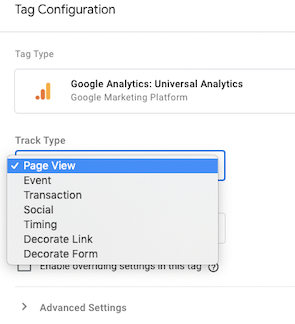
- Select the desired ‘Track Type‘ based on what you like to track. In this case, I’m trying to track the page views. So select page views from the drop down.
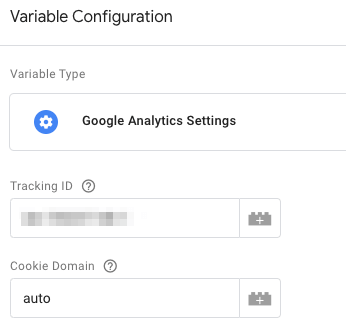
- The next step is to add the Google Analytics variable. Click on ‘Select Settings Variable‘ and click on ‘New Variable’.
- Add the ‘Google Analytics tracking id‘ in the first tab and select ‘auto‘ for Cookie domains. Click Save.
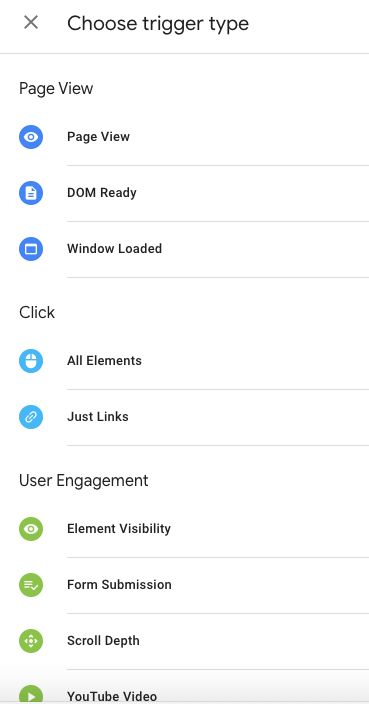
Triggering
Here, you can select the trigger based on which you need the record to be updated. You can either select the default trigger, which is ‘Page View’, or select others from the mentioned list. And click save.
- Save the tag.
That’s it. You have successfully added a Google Analytics tag to your website using Google Tab Manager.
3. Use WordPress plugin to add Google Analytics code
This is the easiest of a method to add Google Analytics or any other external code to your website. In this method, you’ll be installing one of the available plugins in WordPress to get the job done. There are plenty of free plugins in WordPress that can do this for you. In this instance, we’ll be making use of a plugin named ‘Head, Footer and Post Injections’.
Follow the below-mentioned steps to use this plugin to add the Google Analytics code to your WordPress site.
- Navigate to Plugins -> Add New
- Search for ‘Head, Footer and Post Injections’. Install and Activate the plugin.
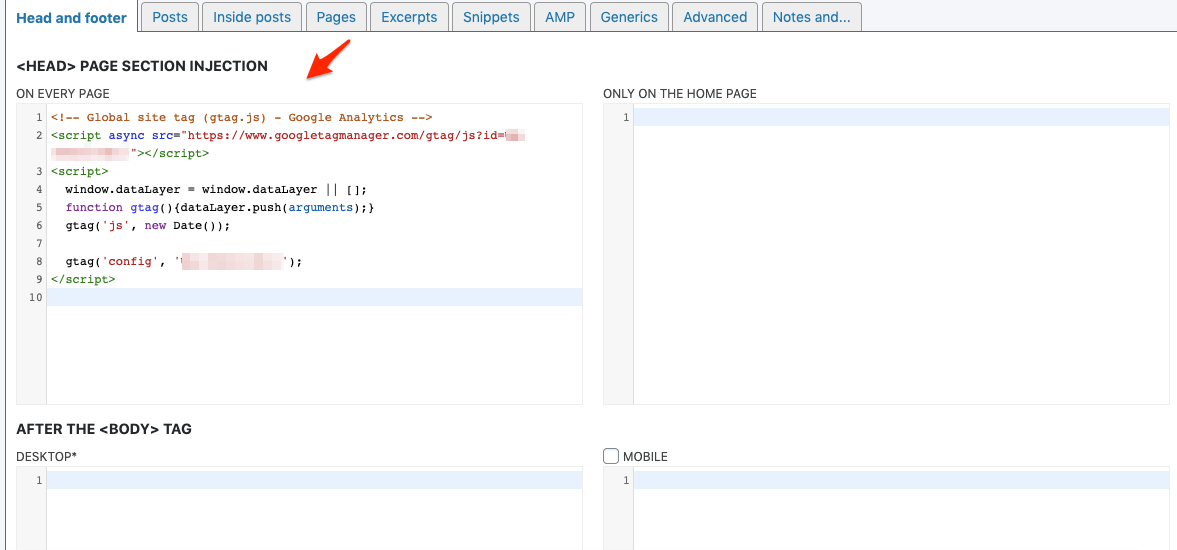
- Once you activate the plugin, navigate to Settings -> Header and Footer
- Here you’ll get different sections as to where the code needs to be placed on the page. In the case of Google Analytics code, add the copied code under the <HEAD> tag for each page.
That’s it. Easy as that using an external plugin.
How to check if Google Analytics code is properly installed?
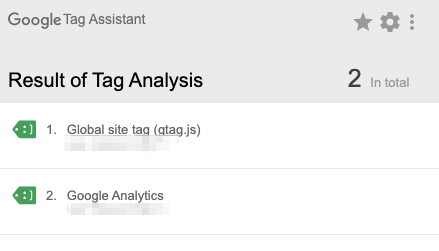
There are different ways of checking if the copied Google Analytics code is working properly. One of the easiest and efficient ways is to make use of Google’s free Chrome plugin ‘Tag Assistant‘. You can download the same here.
Once you add the plugin to your browser, navigate to your website where you’ve installed the Google Analytics code. Just click on the installed plugin in your browser. The plugin will automatically show if Google related tags are present in the page.
Conclusion
In this article, we discussed in detail how we can add the Google Analytics code to your WordPress site. We went through 3 distinct methods of adding the code, along with checking the installation status.
FAQs

How to Deactivate or Delete your Facebook Account

Facebook Audience Types – Saved Audience

Setting Google Analytics for your website – Track incoming traffic
About Author
Anish
Digital Marketer, passionate about travel and adventure sports. Follow on Facebook Profile - https://www.facebook.com/anish.sudarsan/ & Instagram Profile - https://www.instagram.com/anishsudarsan/